This month we're going to make the baskets for the hot air balloons. You will need to print the requisite number of basket templates for the size quilt you're making. Remember to download it to your computer, then open in Adobe Reader and print it actual size onto 11x17" paper. Do not print straight from the web. If you measure the template pieces they should be 6.5" by 10.5" in size.
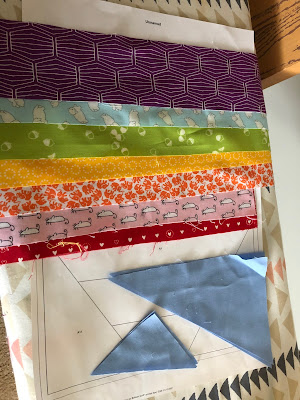
You will need your background fabric, your basket fabric(s), and if you want to fussy cut the insides of the baskets, the best fabrics are ones with a blue background or a background that matches your background fabric.
I decided to cut up the rest of my background fabric at this point, starting with the pieces I needed for the hot air balloon tops. I cut pieces about 7" by 8" and then cut them on the diagonal. This will only work if you're using solids. If you're using a print, make sure you choose the correct diagonal to cut them on, and if you're using a directional print, you may want to wait and cut your background as you come to those pieces. I also cut roughly 5"x5" pieces for the baskets, then 3"x11" pieces for the baskets, and finally 4"x4" pieces that I also cut on the diagonals for the hot air balloon tops. If you're not fussy cutting the basket insides, you might want to also cut roughly 2.5" by 3" pieces. Note that I prefer to cut pieces for paper piecing at least .5" to 1" larger than called for to ensure extra wiggle room.

Set aside the background pieces for the balloon tops for now. Then if you're fussy cutting, cut roughly 2.5" x 3" pieces with a person or animal for each balloon. Err on the side of extra room above the person. They don't even need to be rectangular, since we'll be trimming the pieces as we go.
Now take your paper templates and swap the A1 and A2, especially if you're using fussy cut centers. And if you think you'll forget which parts are supposed to be background and which the basket fabric, you can also write right on the template what goes where.
So there are many ways to paper piece, there are plenty of YouTube videos and other tutorials out there. This is my method. It does waste a bit of fabric, but I find it to be fairly simple and straightforward. Step number one, take your background or fussy cut person, and position it on the side of the paper template that doesn't have lines, with the fabric facing out and away from the paper. Then using a strong light source, make sure your piece is positioned properly. Some people use a dab of glue to keep it in place, I just hold it firmly with my hand. Make sure the fabric overlaps the outside dotted line on top, and there is at least some overlap along the other seam lines.
Then holding that piece firmly in place, take your A2 basket piece and with the fabric face down and pointed towards the template, use the light source to position it about 1/4" over the line between A1 and A2.
Now, continuing to hold the two pieces firmly with your fingers, place the pieces and template so the needle starts at the edge of the paper. Make sure your stitch length is set somewhere between 1 and 1.5 (I find 1 to be too short and the paper tends to come apart too easily, but it might not be on your machine). Start sewing along the line between A1 and A2 and sew past the bottom line by at least 1.4".
With some of the trickier pieces it's a good idea to finger press your added piece to it's final position and use your light source to check and make sure it covers the full area and also any outside seam allowances fully. If it doesn't, you can seam rip and try again. Then fold it back to the position you sewed it in. Take it to your cutting board, fold back the paper along the seam line, and trim the fabric to 1/4" seam allowance.
It's easiest to trim if you put the fabric side down, so the excess is peaking over the edge of the paper.
Then fold the paper back into its original position and press the piece into its final position. Go back to your machine, rinse and repeat one piece at a time, until your whole template is covered.
Note: If you want to attach more than one piece at a time, like I did with the basket ropes, make doubly and triply sure that you are folding the first piece out of the way fully before sewing the second, so it doesn't get caught in the seam allowance, and again when you're trimming, make doubly and triply sure that the pieces are not in the way when trimming to a 1/4" seam.
Note: Sometimes you'll end up short on a piece and maybe you realized the piece is just not going to be big enough to cover the full area even if you seam rip and reposition. In this case, just trim the seam, press it, and then take another piece and add on to the place where you don't have enough coverage. You won't have a line to follow on your template, but you can either draw one in or just try to sew as straight as possible. I did this on my practice block (the background fabric to the left of the balloon has an extra seam in it, because the triangle I cut just wasn't large enough).

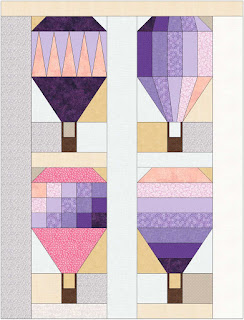
Once you're comfortable with the process of paper piecing, I usually make the first piece by itself so I can figure out where the tricky bits are. But then I'll chain piece the rest one piece at a time so I'm only getting up to trim and press once for all of the templates. And here are all eight of my baskets (depending on which size you're making, you might have more or less than that). You'll note that I did not leave enough room above the king, so his waist is a little higher than I would have preferred, but other than that I'm pretty happy with how these turned out.


Comments
Post a Comment